SiteLink by Storable allows you to set up your inventory of merchandise and also keeping track of your stock levels. Follow the instructions below to add or modify merchandise in SiteLink.
1. Log into SiteLink Web Edition and navigate to Site Setup and then Merchandise. |
|
2. In the Inventory screen, click Add on the far right. |
|
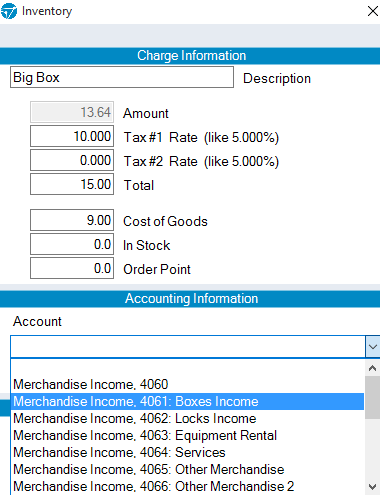
3. On this screen, enter the name of the item in the Description box. |
|
|
4.
For this example, we’ll choose Merchandise Income, 4061: Boxes Income. This is because we are classifying it as a box type. If you have a merchandise item that doesn’t fit into a category in the accounts, you can choose an Other Merchandise account. |
|
5. Check Currently used at this site. |
|
5. Click OK to add your merchandise to the list. |
|
6. If you entered “0” in the In Stock field, you can come back to this screen to edit the amount in stock. Once you know the correct number, click on the item, highlight it from the list of merchandise, and select Edit on the right. |


Be sure to stay on top of your stock levels. If you do not add new POS items to your in-stock count when purchasing, inventory will start showing as negative in SiteLink.